Unit Title: Ideas in Printmaking
Grade Level: 10
Time: 90 min class sessions
Overview:
Sophomores at X are taking printmaking for the first time, and generally have experience with detailed life drawing. Their teacher expressed concern for a school-wide tendency to highlight proficiency of skill, instead of taking risks or tackling big ideas through artwork.
The goal is to approach printmaking as a solution to a conceptual problem. The constraint (or assignment) involves a comparison between concept and process:
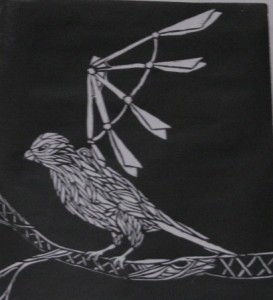
an elaborate lie is like a linocut, which pretends to be a woodcut, and must be toiled with and detailed. It cannot be taken back. It will multiply and spread, with slight variation.
From this standpoint, students can approach the acquisition of skill in a way that emulates a true art practice: techniques emerge when artists experiment with different approaches to fulfill some intent. Students will develop a creative and original image, and investigate (and practice) different styles of cuts and marks that best fulfill their intent.
Learning Objectives:
Students will
- understand the relationship between concept and process.
- engage in research and dialogue.
- understand the notion of avoiding cliché material to develop creative, original images.
- learn the technique of drawing from reference.
- learn the technique of preparing a drawing for a linoleum block.
- learn the technique of transferring images in reverse.
- learn the technique of cutting and gouging linoleum.
- learn the technique of printing editions and work prints.
Materials/Equipment:
drawing paper, pencils, sharpies, photocopier, transfer paper, linoleum sheets, speedball gouges and blades, printmaking ink, plexiglass sheets, rollers, printing paper
Artwork/Media:
On the 4th week, after having developed their own creative image, students will do a research exercise to prepare for group discussions about the relationship between the elements of design (which they are already familiar with) and concept.
- Each student is assigned a printmaker to investigate.
- They must gather basic biographical information, discuss their first impression of the works, identify the strongest element in the work and mention how that element might play out in their own piece totaling around a page of writing.
- They must also print at least two images to share with their classmates.
There are twenty-seven artists (one for each student in the class): Felix Vallotton, Joan Miro, Picasso, Carl Eugen Keel, Ugo da Carpi, Rembrandt, Carlos Alvarado Lang, M.C. Escher, Francisco de Goya, Katasushika Hokusai, Hiroshige, Judy Mensch, Ernst Ludwig Kirchner, Michael Arike, Rudyard Kipling, Emil Nolde, Susan Pyzow, Nicholas Sperakis, Steven Walker, Bill Murphy, Karen Whitman, Edmund Evans, Erich Buchholz, Aubrey Beardsley, Gustave Doré, Albrecht Durer and Kiki Smith.
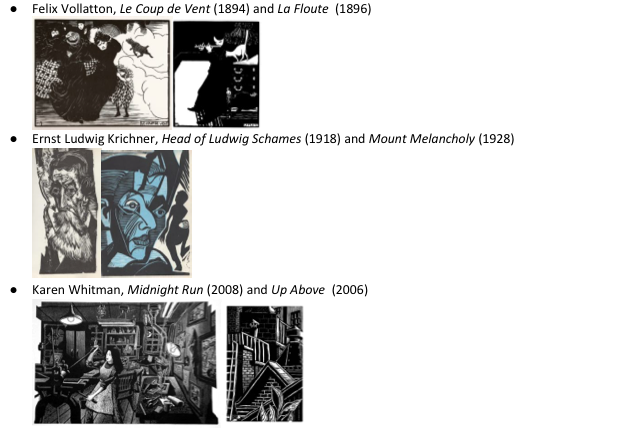
These artists come from different years, places and styles. Here are some examples:
 The students gather in groups of four or five and share their findings, then move on to a discussion of the elements present in each other’s images.
PROCEDURE:
Week 1
● Students are welcomed to the Intro to Printmaking Class, and after introductions and a few words on the process of linoleum cuts, they are given their first assignment: elaborate lie.
an elaborate lie is like a linocut, which pretends to be a woodcut, and must be toiled with and detailed. It cannot be taken back. It will multiply and spread, with slight variation.
○ Students are introduced to the term cliché, and those who are in danger of approaching it perform writing or drawing exercises that aim to find the essence of their idea, and encourage an iteration that does not resort to overused imagery (determined on a case by case basis).
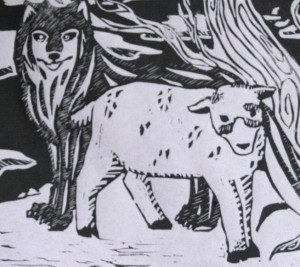
■ Example: one student was convinced she should draw a gigantic eye with a world inside of it. I asked her to write five words that this image evokes. She wrote words like responsibility, doom, and nature. From these words she developed new sketches. She arrived at an image of a wicked forest seeking vengeance (a fantastical take on an elaborate lie), which was much closer to her conceptual intent.
Week 2
● Students who have arrived at an idea they are excited about begin the process of researching visual references to improve their drawing.
● Students develop a few compositional possibilities that work in an 8×10 block size.
● When the work takes form, then students use tracing paper to outline the basic shapes of their drawing with sharpie. They make several photocopies of the traced image, and try to map out a variety of cuts and marks for their linocut, defining which sections will be white, black or have some texture.
● Introduction to the stamp assignment.
○ The class gathers in the front of the room for a demonstration. Each student will receive an 1.5×1.5 inch block to create a stamp.
■Trace the perimeter of the block onto a sheet of paper, and create a design for initials inside.
■Then take tracing paper and use pencil to trace the design.
■Flip the tracing paper onto the block, so the pencil faces it.
■Make sure the outlines match the perimeter of the block, and rub the back with a spoon to transfer the lead onto the block. Correct any missing areas with pencil. It is optional to go over the lines with sharpie, so they won’t rub off during the cutting process.
○ Then the cutting begins. There are five blades in the speedball kit: Two v gouges, two u gouges and one flat blade.
■Insert the flat blade securely into the speedball, making sure the edge of the blade wraps around the metal sphere (compare the wrong way to the right way)
■Use the flat blade to outline all the shapes in your cut, that way you can control how much linoleum the gouges peel off.
■Use the u gouges to clear away large areas and the v gouges for sharper lines. Save details for last.
● Before Midwinter Recess, students are assigned an artist to research.
○ They should gather essential biographical information, write about their impressions of the work, and identify a strong element (of design) that they would be curious to incorporate into their own work. (max 1 page)
○ Students should print out a few examples of the artists work.
● After the break, students bring in their research.
The class is divided in to groups of four and five.
○ Each group talks for fifteen minutes about their findings and shares the artist that they investigated with their peers.
After this conversation, each student presents their plan for their linocut to their peers, and receives feedback regarding concept and style, engaging in dialogue with some of the artists they have just explored. (15 min)
After the dialogue, each group shares any discoveries from the conversation.
→ Students mentioned a desire to try a certain type of line or style that they admire from the artists. Also, students naturally made the assumption that I paired them with an artist that would inform their practice.
Week 5
● Before beginning their linocut, students should have:
○ completed a plan that designates white, black and alternatively marked areas
○ completed a stamp with their initials and produced a print of this stamp
○ turned in their research
● Another demonstration of transferring images to linoleum and gouging safely begins the class.
● A few students are ready to begin their piece!
→In retrospect, the stamp assignment was a great idea, as students are no longer intimidated by the tools.
Week 6
This week is dedicated to toiling through the linocut. At the end of the week, students gather for a printing demonstration using the vandercook press.
- Place your printing paper on a sheet of newsprint and trace the corners with pencil.
- Place your block inside the traced rectangle and use a t-square to ensure it is perpendicular and centered in relation to the dimensions of the printing paper. Trace the corners of your block onto the newsprint.
- Go over the markings on newsprint with a visible pen.
- The newsprint belongs under a thin plastic sheet that lies on the base of the Vandercook Press (under the block). It should be taped on one edge, to make sure it doesn’t move.
- Ideally, most students have the same block size and paper dimensions, so one sheet of newsprint should suffice unless someone is planning special registry.
- With this template in place, it will be easy for students to set their block in the designated rectangle, and center their paper on top of it.
- The press should be set to the correct pressure, and students should run the prints with a few newspapers on top if they want a richer effect.
Assessment of Student Work:
Name ___________________
|
Print editions and work prints should be placed in portfolio. |
Points Received |
Points Possible |
|
Preliminary sketch (Week 1) |
2 |
|
|
Final Drawing |
10 |
|
|
Photocopies (2 or more) to map cuts, including white areas, black areas, and textures. |
3 |
|
|
Initial stamp (Week 3) |
5 |
|
|
Research Assignment – Due March 2 – |
10 |
|
|
Insightful participation in group discussions |
5 |
|
|
Elaborate Lie Linocut complete |
15 |
|
|
Edition of 5 Elaborate Lie prints |
10 |
|
|
2 experimental Elaborate Lie work prints |
5 |
|
|
Portfolio complete |
5 |
____ /70
Visual Art Standards:
Standard 2: Knowing and Using Arts Materials and Resources
Students will be knowledgeable about and make use of the materials and resources available for participation in the arts in various roles.
Standard 4: Understanding the Cultural Dimensions and Contributions of the Arts
Students will develop an understanding of the personal and cultural forces that shape artistic communication and how the arts in turn shape the diverse cultures of past and present society.


